How to Easily Set Up Your MX Records - Step-by-Step Guide
lemwarm
March 20, 2024
|4 min read
Imagine this:
You’ve carefully crafted your outreach campaign and sent it out. ✔️
Prospects are captivated by what you offer and reply to you to declare their interest. 👍
It looks like your outreach is working! 🍾
The only problem?
You didn’t set up your MX email records, meaning none of the replies will reach you. 😔
To put it bluntly, without MX records, it makes no sense to do email outreach!
MX records ensure you get the replies people send you.
Below, we’ll help you set up your MX records. We have tutorials for several email and domain/hosting providers.

MX Records Explained 🏫
An MX record tells the sending email server where to route the email. More specifically, it determines to which receiving server the email should be routed.
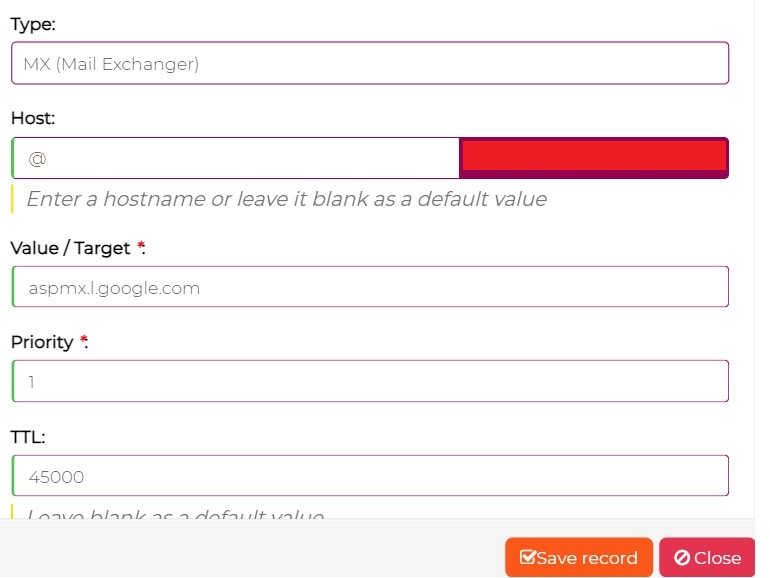
Here’s an example MX record:
Name:
Type:
Priority:
Value:
TTL
@
MX
1
aspmx.l.google.com
45000
Here’s what it all means:
- 👉 The @ means the MX record is meant for your root domain. So, if an email is sent to email@yourdomain.com, this record will come into effect.
- 👉 The Type in this example is MX. Some domain/hosting providers require creating a TXT record as an MX record instead.
- 👉 The Priority determines which servers should be used first. This allows for backup servers to be set up with lower priorities. If the main server fails, these backup servers come into play. Important: the lower the priority number, the higher its priority actually is. 0 is the highest priority.
- 👉 The Value (AKA Mail Server) field is where you’d put the mail server, for example: ASPMX.L.GOOGLE.COM
- 👉 TTL means time to live. It has nothing to do with some James Bond movie. Instead, it instructs the server to delete its information after the TLL period is over. The time is specified in seconds.
Setting Up MX Records 📝
If you use an email service provider to send emails, this is where you should get the required MX record(s).
Then, armed with the record, you’ll add it to your domain or hosting provider.
Now, every time your domain receives an email, it will be routed to your ESP’s receiving mail server. This ensures you actually get those valuable replies.
How to Set up Your MX Records for Specific Providers
In terms of email service providers, we have tutorials on:
Regarding email and domain providers, we have step-by-step guides on:
How to Set up Your MX on Any Email and Domain Provider
If your email or domain provider isn’t on the list above, try the following.
Step 1: Get your ESP’s MX record(s)
- ➡️ Log in to your email service provider
- ➡️ Go to “Domain Settings” or similar
- ➡️ Look for your ESP’s MX record(s)
Step 2: Add the record(s) to your domain or hosting provider
- ➡️ Log in to your domain provider or hosting account. This depends on where your domain’s name servers point to.
- ➡️ Go to your domain’s DNS settings
- ➡️ Add a new record
- ➡️ Select MX or TXT as the Type, depending on what type of record your ESP uses
- ➡️ Add your MX record
- ➡️ Click save
DNS changes can take up to 48 hours to propagate fully.
Let’s Get Those Replies! 💪
Congrats on setting up your MX records!
Correctly setting up your MX records guarantees you will receive those precious replies!
The replies are where conversion happens. Not getting them is out of the question.
Follow the steps above to avoid that from happening!